Email is the best form of communication at the moment
GSXR conversion kit installation
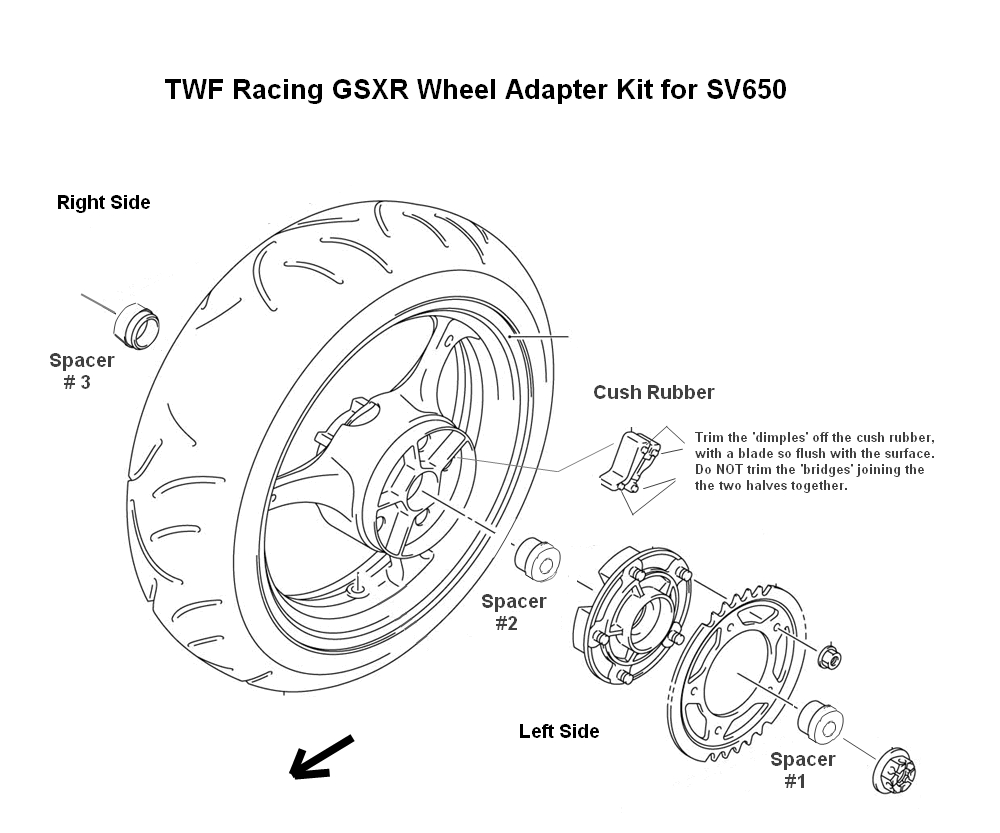
Spacer #1 is installed in the outside of the Sprocket Carrier – you will normally receive this spacer pre-installed.
Spacer #2 is the Left Side Wheel spacer – note the orientation of the spacer with the narrower diameter fitting into the wheel bearing. Note to identify Spacer # 2 correctly – this is the spacer with the groove in the larger diameter section.
Spacer # 3 is the Right-Side Wheel spacer, similarly, fitting with narrower diameter into wheel bearing on right side.
Before fitting Sprocket Carrier, the small ‘dimples’ on the Cush Rubbers must be trimmed off with a sharp blade so the surface is flush. Do NOT cut the ‘bridges’ that couple the two halves of each rubber together.
*Note that when spacers are installed in the Sprocket Carrier & Wheel (both sides) they will be ‘captive’ and remain in place during wheel installation & removal.
Ensure that when they are installed, they are seated fully ‘home’ in each location.